Building a custom Plover board
Timothy Aveni
28 February 2015
I recently finished building a mechanical keyboard to use with the Plover stenography system.
This final design wasn't what I had in mind when I started the project. I was looking to design the board myself, because Plover uses a very special key layout that just doesn't work with a normal keyboard:
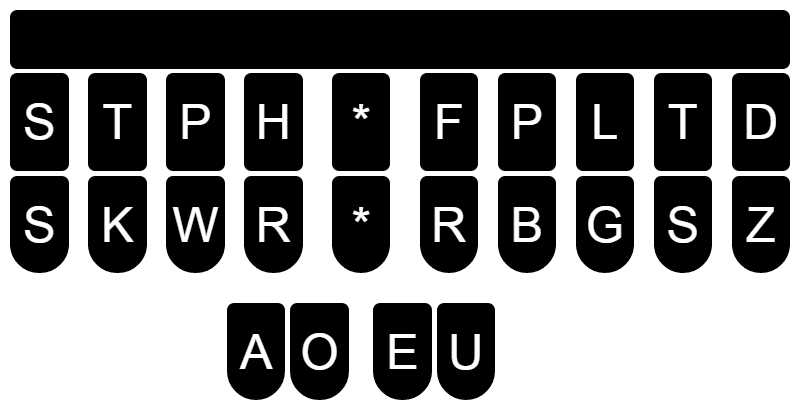
It's possible to use Plover with a normal n-key rollover keyboard. But Plover often requires you to press two vertically-aligned keys at once with a single finger. I even went as far as flipping the top row of keycaps upside-down on my Poker II, which made the keys easier to hit at the same time. Still, the problem of the keyboard's staggered rows was unavoidable. It's very difficult to effectively use Plover when the vertical keys are not actually located directly above and below each other.
My first design was much larger than this. I worked out the ergonomics of the thumb keys and tried to design a plate that would work well for Plover. Another limitation of a standard keyboard is that the thumbs are too close to where the other fingers rest, forcing the hands into an uncomfortable position. In my design, I wanted the thumb keys to be very far away from the rest of the keys.
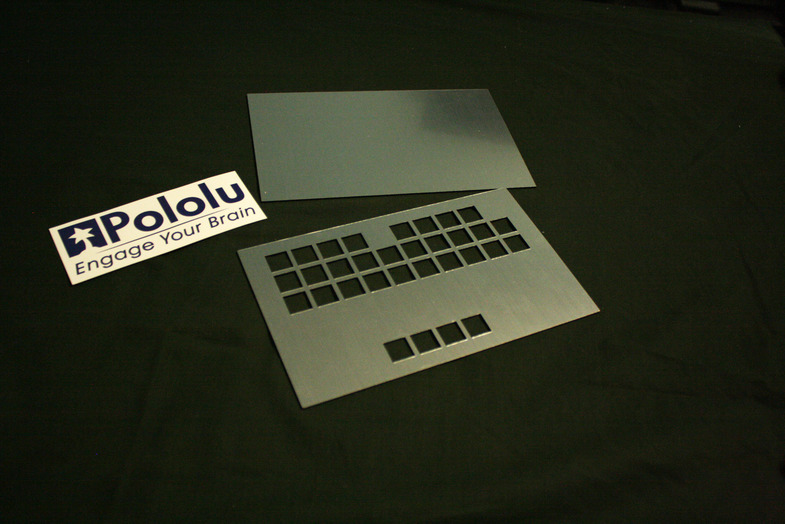
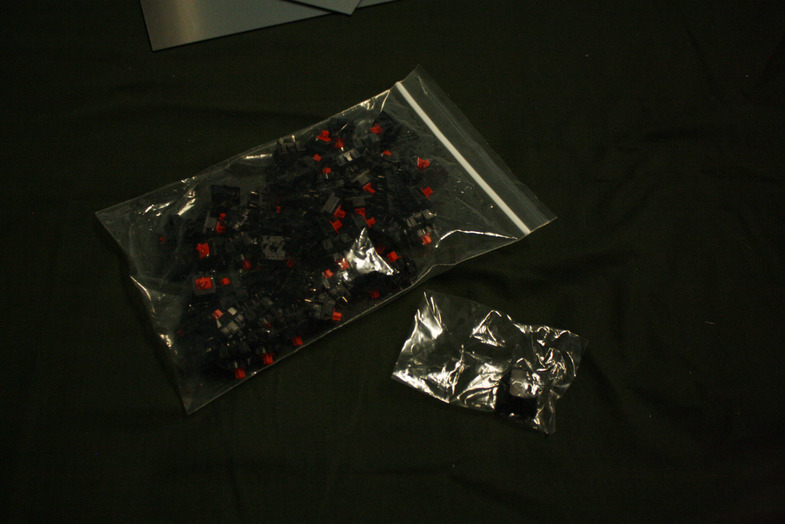
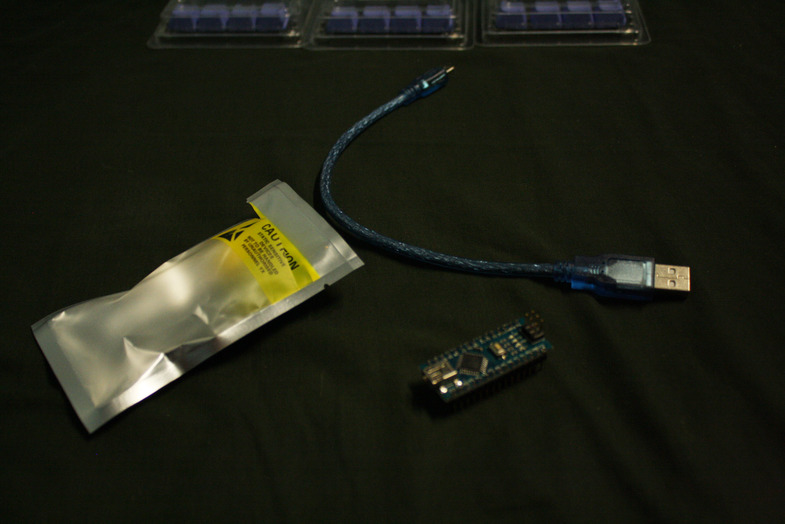
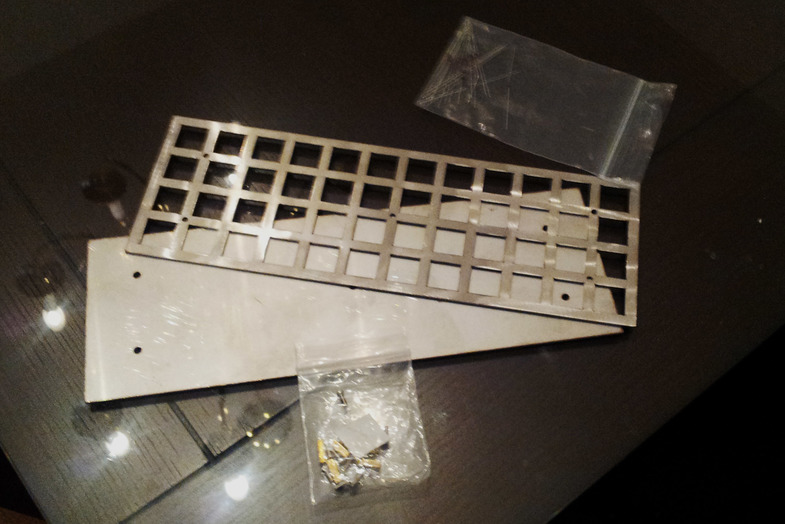
I got aluminium-brushed acrylic plates laser-cut from Pololu (who were very helpful) to my specification. I also ordered 50 Cherry MX Red switches from mechanicalkeyboards.com and an Arduino Nano to program the board.
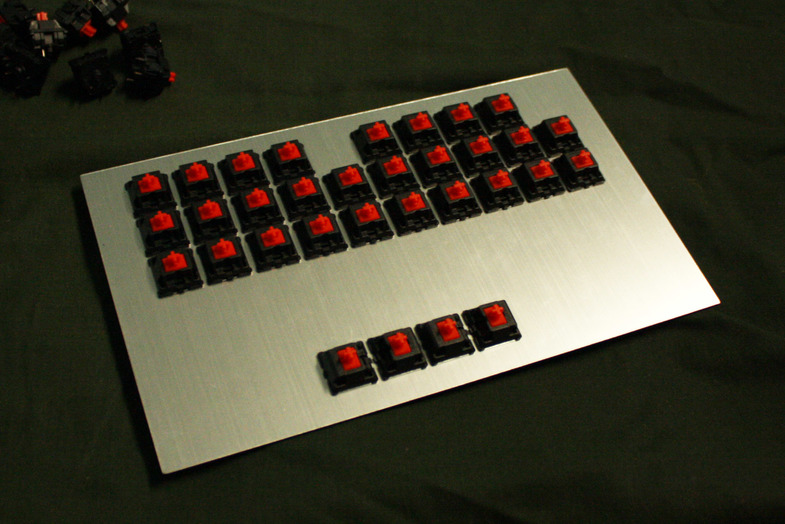
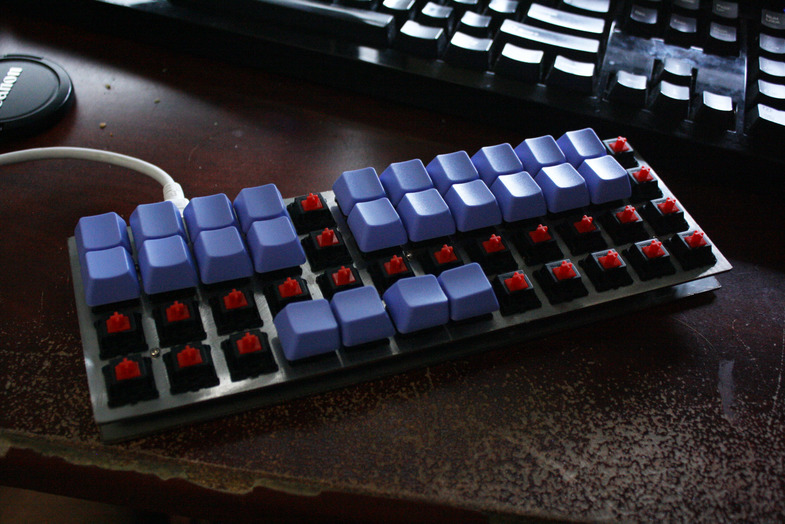
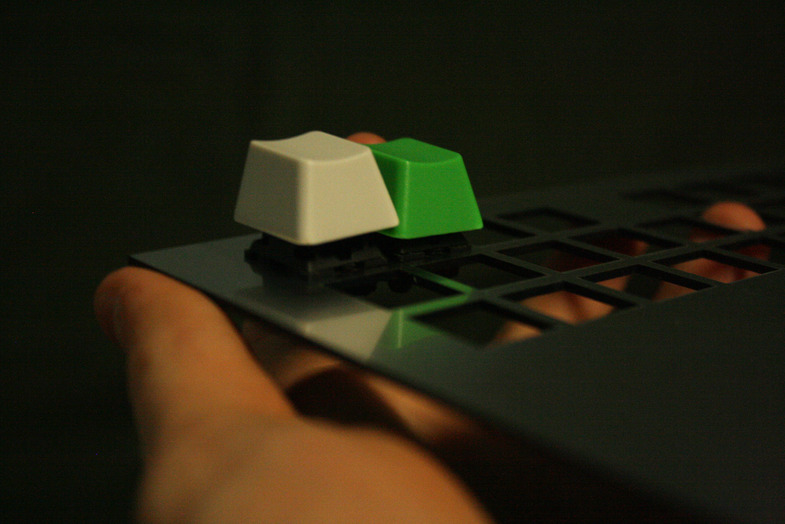
I needed keycaps, too, which posed an interesting issue. I was looking to buy only row-2 keycaps (the ASDF row) for this board, because I had determined that it was most convenient to press two keys at once when they were both row-2 caps and the cap in the top row was upside-down. There is almost no gap in between the keys in this arrangement, which you can see in the first photo in this post.
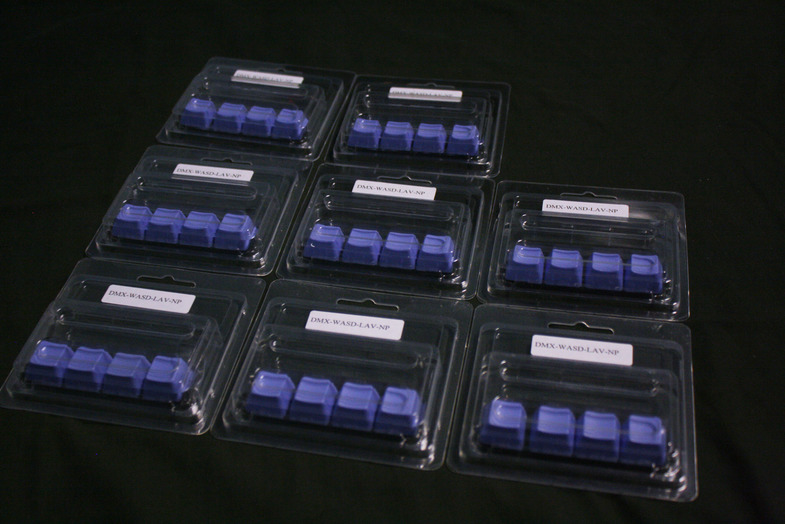
The keycaps for the number row, which would have been along the eight switch holes along the top of the board, didn't need to be row-2 caps, so I was open to using any sort of caps for those. I realised that I needed twenty-four row-2 caps and eight row-3 caps, which was a perfect proportion to use sets of WASD keycaps! I ordered eight sets of lavender WASD caps from Elite Keyboards, which cost fifty cents per cap; this was the best price I could find for such a specific keycap order. Elite Keyboards didn't originally have enough keycap sets in stock, but they were quick to restock them on the website when I e-mailed them asking for some means to purchase eight sets (I suppose ordering eight WASD sets isn't particularly common).
If you've built a mechanical keyboard before, you might already have seen the problem. Unfortunately, I misinterpreted a crucial bit of data from the /r/mechanicalkeyboards wiki; where I should have included 5mm spacing in between each key, I included only 3mm. This made my laser-cut plates useless.
The keys do not fit this tightly on the board. Pressing down one keycap would interfere with the keycaps to its side.
This was a discouraging development. I toyed around with new designs for the board, increasing space between the keycaps and trying out other ideas like rotating the thumb keys. I wasn't even sure I still wanted to use an acrylic board, because it was a bit more flexible than I thought was reasonable; since Plover involves pressing down lots of keys at once, I didn't want the plate to flex while it was being used.
My inspiration to build the keyboard came back when I saw Jack Humbert's design for the Planck Keyboard, especially because his steel plates are very affordable. The layout is a perfect grid, which was ideal for my project. I realised that, with a slight modification to the stenography theory behind Plover, the number row does not have to be above the keys, but would probably work just as effectively if it were located below the main letter keys.
This realisation allowed me to circumvent the issue of the thumbs being too close to the other fingers while typing, and I can confirm now that this change is pretty comfortable. I went ahead and bought materials to build a Planck, which included twenty new diodes (I hadn't originally purchased quite enough for the 48-key planck), two plates, and set of spacers and screws. I did already have enough key switches to fill the entire board, because I had purchased a 50-pack from mechanicalkeyboards.com. Unfortunately, as you saw earlier in the post, I don't have enough keycaps to fill the board. I decided to go ahead with the project anyway and deal with the awful contrast between bare red switches and lavender caps.
This was my first soldering project of this magnitude, so I didn't escape without a few burns. But it was pretty successful overall. First, I soldered the diodes:
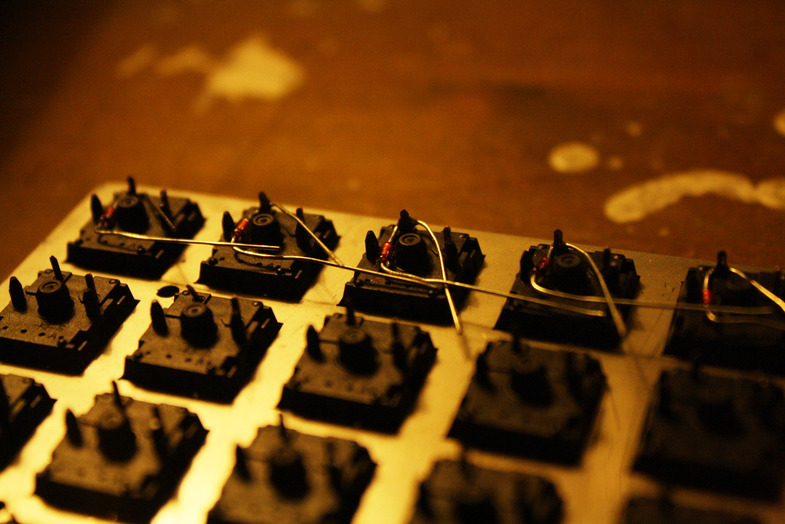
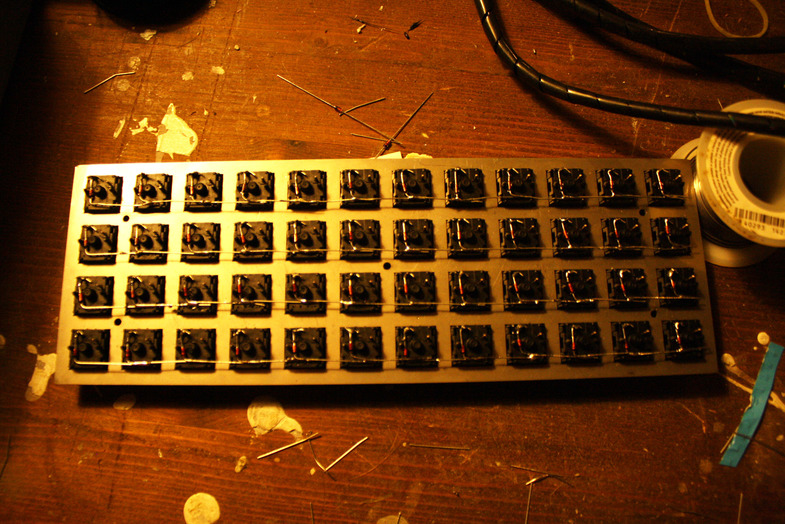
Then I soldered columns to finish up the keyboard matrix.
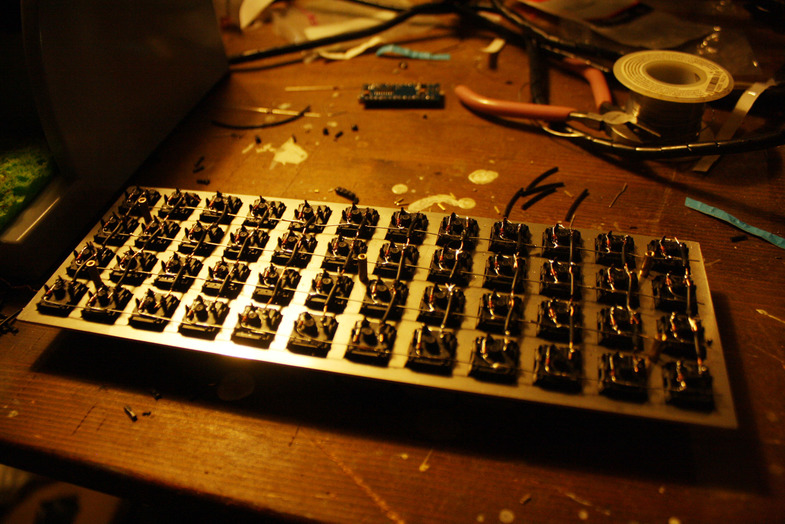
Then it was just a matter of wiring up the Arduino to the keyboard!
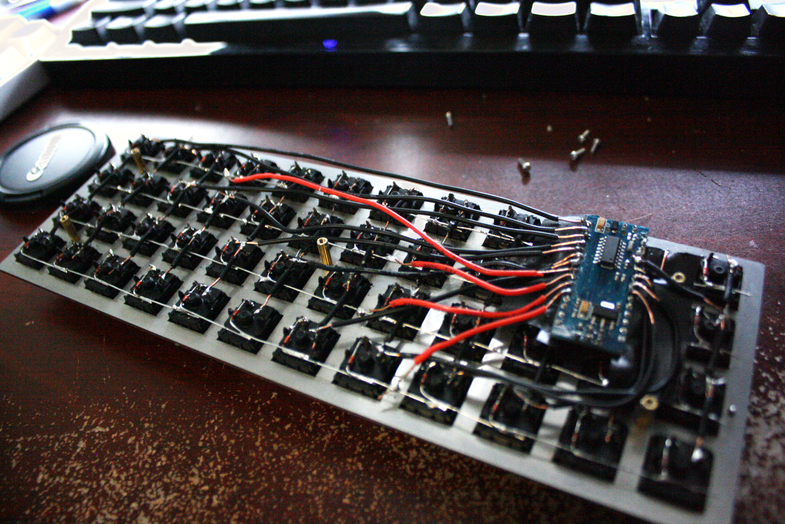
I used an Arduino nano because I got it for <$4, including shipping, on AliExpress. I didn't need the keyboard to work as a USB keyboard, so there was no need to use anything with hardware USB slave support like a Teensy. Instead, I used a simplified version of the TX Bolt protocol (thanks Charles Shattuck for that knowledge) to communicate over Serial with the board. This way, I can have this board plugged in alongside a normal keyboard and switch between the two without having to disable Plover, because Plover is not relying on USB keystrokes to interpret input.
This means the uncapped switches are essentially useless at the moment. I don't even have them hooked up as a number row yet, though I do intend to do that at some point. Without dropping in a new microcontroller, this board will not work as a "regular" keyboard. But it works great with Plover! It took me only a few minutes to set up a very simple firmware with the Arduino IDE, and now I can type ergonomically with Plover (no, this post was not typed with Plover. I'm not quite that fast yet).
If I were to rebuild this keyboard from scratch, I'd probably get switches from the Open Steno Project's crowdfunding campaign for switches designed specifically for steno. The main issue would be finding compatible keycaps, just because Cherry caps are so much more readily available.
Cost:
- Failed plates - $25 + $8.45 shipping
- Cherry MX Red switches x50 - $29 incl. shipping
- WASD keycaps x8 - $16 + $3.81 shipping
- Arduino nano - $3.75 incl.shipping
- Planck top/bottom plates - $24. Diodes x20: $2. Planck spacer kit: $2.50. Shipping $4.03.
- Diodes from RadioShack: undocumented, somewhere around $6
Thanks:
- Pololu, for their helpful customer support while I was trying to get my first plates cut.
- Elite Keyboards, for quickly restocking the keycaps I needed.
- Jack Humbert for inventing the Planck Keyboard.
- Charles Shattuck for acting as one source of inspiration for this project, and also for his guest post on Mirabai Knight's website that explained his simplified use of the TX Bolt protocol.
- Mirabai Knight for her incredible work on the Plover stenography system.
- /r/mechanicalkeyboards for fostering my dedication to mechanical keyboards; this is my third! Also to calmtaysi on #Mechboards for helping me out with wiring, MrFahrenheit for correcting a typo, and ihre for helping me get my server working over IPv6.
Discussions: